Indoor LED lighting has become a practical standard for offices, warehouses, hospitals, retail spaces, and public buildings. The U.S. Department of Energy reports that LED bulbs use at least 75% less energy and last up to 25 times longer than incandescent lighting. However, long service life does not mean zero maintenance. Dust, heat, loose connections, driver failures, and unsuitable dimmers can still reduce performance.
This guide explains how to maintain indoor led lighting systems through inspection, cleaning, testing, and timely replacement. The International Energy Agency identifies lighting as a major electricity-use category worldwide, so small maintenance improvements can produce meaningful operational savings. A dusty high-bay fixture, for example, may deliver visibly weaker illumination across a warehouse aisle. In a meeting room, unstable dimming may cause flicker, eye discomfort, and complaints.
Maintenance should begin with a clear record of fixture locations, wattage, color temperature, installation dates, and driver specifications. Check vents and heat sinks before they become blocked. Inspect wiring and terminals only through qualified personnel and approved procedures. Safety matters.
A maintenance plan should also measure results, not merely record completed tasks. Compare illumination levels, energy use, fault frequency, and replacement costs over time. The U.S. Department of Energy’s Solid-State Lighting research emphasizes thermal management, controls, and component reliability as important factors in LED performance. Still, manufacturer claims are not always equal to field results. Real buildings are messier. Therefore, this guide combines published industry evidence with practical checks, while recognizing that every indoor environment needs adjustments.
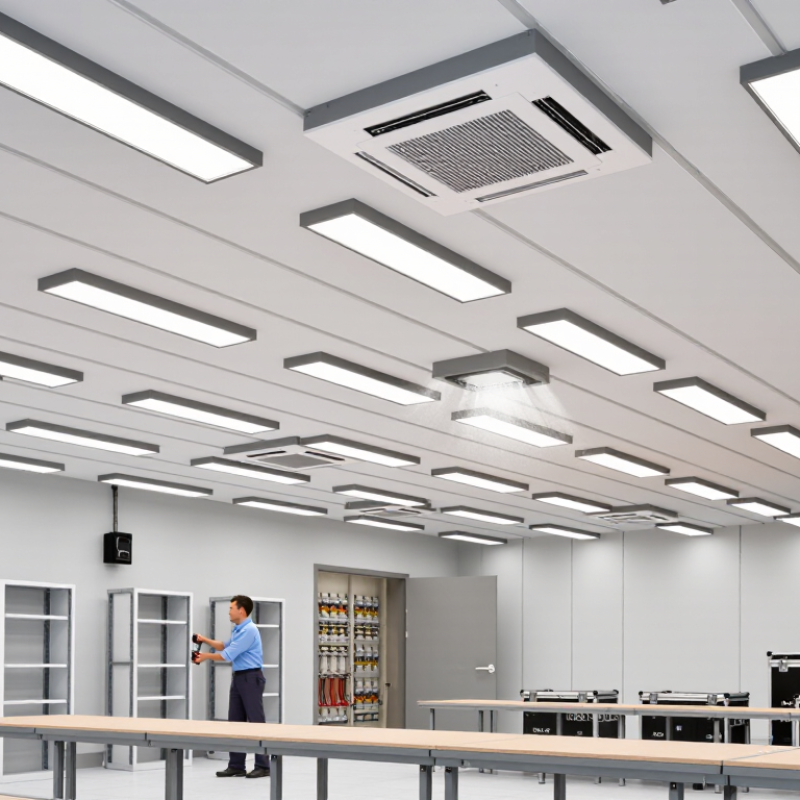
Understanding each component makes indoor LED maintenance more accurate. An LED system includes light-emitting diodes, a driver, heat-management parts, lenses, housing, wiring, and control devices. Each part affects brightness, safety, and service life.
The driver converts building power into a stable current for the LEDs. Flickering, delayed startup, or sudden dimming may indicate driver stress. Turn off the circuit before checking connections, and let the fixture cool. Loose terminals can create heat marks around the connector. A trained electrician should inspect damaged wiring or repeated electrical faults.
Heat is a quiet problem. Dust on heat sinks and ventilation openings can trap warmth around the LED board. Use a dry, soft brush or low-pressure air during scheduled cleaning. Avoid spraying liquid into the housing. Clean lenses with a slightly damp, lint-free cloth. Harsh cleaners may cloud the optical surface and change light distribution.
Controls and sensors also need attention. Check occupancy sensors for blocked views, and confirm dimming settings match the driver’s specifications. A sensor may appear defective when furniture simply interrupts its range. I once focused on a dirty lens and missed a loose control cable. That mistake reminded me to inspect the whole system, not only the visible light source. Record operating hours, temperature concerns, repairs, and unusual noise. These details help reveal patterns before a small component failure interrupts indoor work.
How to Maintain Indoor LED Lighting Systems?
Creating a Safe Inspection and Maintenance Schedule
A safe LED maintenance plan begins with a written inspection schedule. The International Energy Agency reports that lighting uses about 15% of global electricity. Efficient fixtures still need careful attention. Inspect high-use areas monthly, and review all fixtures quarterly. A trained technician should check loose wiring, damaged lenses, dark spots, unusual buzzing, and heat around drivers. Switch off power before opening any housing. Verify isolation with an approved tester. Never trust a wall switch alone.
The U.S. Department of Energy notes that LED lifetime depends heavily on temperature, electrical conditions, and lumen maintenance. Therefore, record room temperature, operating hours, and replacement dates. Examine ceiling fixtures near kitchens, workshops, or dusty storage rooms more often. Dust can trap heat. Emergency lighting requires separate functional tests and documented results, following local safety requirements. I have seen clean fixtures fail because a loose terminal was ignored. Small defects become expensive problems.
Tips: Keep a simple log.
Write the date, location, readings, and observed defect. Photograph recurring faults when safe. Replace cracked diffusers promptly. Do not mix unverified replacement parts. Review the schedule after renovations, power disturbances, or repeated failures. A practical plan is never perfect; it should improve after each inspection.
Creating a safe inspection and maintenance schedule helps identify overheating, loose connections, damaged diffusers, reduced light output, and emergency-lighting failures before they become safety risks.
The chart shows a practical annual frequency for common indoor LED maintenance activities. Actual intervals should be adjusted according to local electrical codes, building conditions, operating hours, and manufacturer guidance.
Indoor LED maintenance begins with the fixture surface, not the circuit board. Turn power off, allow the housing to cool, and photograph each area before cleaning. Use a dry microfiber cloth or low-moisture cleaner on lenses. Avoid spraying directly onto the fixture. Liquid can enter seams and damage drivers. Dust often gathers along lens edges, so wipe those channels carefully. Work cold.
The U.S. Department of Energy reports that solid-state lighting can deliver substantial energy savings compared with older technologies. However, dirt can reduce delivered light before the LED reaches its rated life. IES maintenance guidance supports scheduled inspections because lumen performance depends on the whole system, including optics and the surrounding environment. A cloudy lens may look clean from the floor but still scatter light across work surfaces. Check illumination at task height with a calibrated meter. Do not guess.
Ventilation areas need equal attention. Vacuum grilles and heat-sink openings with a soft brush attachment, keeping pressure away from delicate fins. The U.S. Environmental Protection Agency notes that indoor pollutant levels can be two to five times higher than outdoor levels, making dust control worthwhile. Record cleaning dates, measured lux, and visible buildup. A simple log reveals recurring problems, although our first schedule may be too optimistic. High-dust rooms usually need shorter intervals. Never use abrasive pads, compressed air near occupants, or unapproved solvents. A clean fixture should operate quietly, stay within its normal temperature range, and maintain stable light output.
| Maintenance Area | Recommended Frequency | Cleaning or Inspection Method | Acceptance Criteria | Required Tools and Materials | Safety and Recordkeeping |
|---|---|---|---|---|---|
| Visual inspection of LED fixtures | Monthly | Check for flicker, dark LED segments, discoloration, loose covers, unusual noise, and visible dust accumulation. | Fixture is secure, operates without visible flicker, and shows no cracked housing, exposed wiring, or heat damage. | Inspection checklist, flashlight, camera, non-contact thermometer if needed. | De-energize equipment before opening it. Record location, condition, and corrective action. |
| LED lens and diffuser cleaning | Every 6–12 months; more often in dusty or greasy areas | Turn off power, allow the fixture to cool, remove loose dust with a soft dry cloth, then wipe with a lightly damp lint-free cloth. | Lens is free of dust, grease, water spots, and residue that could reduce light output or create glare. | Lint-free microfiber cloth, clean water, mild neutral detergent when approved by the fixture instructions. | Do not spray liquid directly onto the fixture. Avoid abrasive pads, solvents, and excessive moisture. |
| Fixture housing and heat-sink cleaning | Every 6–12 months | Remove surface dust from housing, fins, and joints using a soft brush or low-pressure vacuum. | Cooling surfaces are not blocked by dust, packaging, insulation, or stored materials. | Soft anti-static brush, vacuum with a brush attachment, lint-free cloth. | Avoid high-pressure air, which can force dust into drivers or optical components. Follow site electrical procedures. |
| Ventilation openings and air passages | Quarterly; monthly in high-dust environments | Inspect and gently vacuum ventilation slots, driver compartments, louvers, and nearby air paths. | Air openings remain clear, and no dust layer or obstruction prevents normal heat dissipation. | Soft brush, low-pressure vacuum, access ladder or lift where authorized. | Use fall protection and isolate electrical power when access requires opening the fixture or ceiling panel. |
| Electrical connections and mounting hardware | Annually or during scheduled electrical maintenance | Inspect accessible connectors, cable glands, fasteners, suspension points, and junction boxes for looseness or damage. | No loose hardware, damaged insulation, corrosion, overheating marks, or unsupported cables. | Insulated tools, torque tool where specified, inspection light, approved replacement hardware. | Only qualified personnel should perform electrical work. Apply lockout/tagout where required. |
| Illuminance and lighting uniformity | Every 6–12 months and after major layout changes | Measure illuminance at representative work-plane points using a calibrated light meter under stable operating conditions. | Results meet the facility’s design or occupational lighting requirements; investigate significant decline from the baseline. | Calibrated lux meter, floor plan, measurement log. | Use the same measurement points and operating conditions for trend comparison. Keep calibration records. |
| Flicker, controls, and dimming performance | Quarterly and after control-system changes | Test on/off switching, occupancy sensors, photocells, schedules, dimming range, and visible or reported flicker. | Controls respond correctly, lights reach the intended output, and no persistent flicker or unexpected cycling is observed. | Control-system interface, inspection checklist, compatible test instrument if required. | Do not bypass protective controls. Escalate recurring flicker or driver faults for qualified diagnosis. |
| Maintenance documentation and replacement planning | After every service visit; review annually | Log cleaning dates, measurements, failures, part numbers, repair actions, and areas requiring follow-up. | Each fixture or lighting zone has a traceable service history and an identified replacement priority where necessary. | Digital maintenance log, asset list, photos, inspection forms. | Retain records according to facility policy and applicable safety requirements. Replace damaged components with compatible approved parts. |
Note: Adjust maintenance intervals according to dust, humidity, temperature, operating hours, fixture instructions, and the facility’s risk assessment.
Maintaining an indoor LED lighting system starts with safe, repeatable inspections. I switch off power at the circuit breaker, then verify isolation with a suitable tester. A loose terminal can create resistance, warmth, flickering, or intermittent shutdowns. I inspect connectors for discoloration, cracked insulation, and exposed copper. Small defects matter. Wiring should remain firmly supported, with no sharp bends or strained plugs. For critical installations, a qualified electrician should test protective devices and grounding.
Controls deserve the same attention as the lamps. I check timers, occupancy sensors, dimmers, and network settings against the intended schedule. A sensor aimed at a reflective wall may trigger unnecessary switching. I record settings before changing them, which makes troubleshooting less guesswork. Manual overrides should be tested, especially after maintenance or a power interruption. I once blamed a failing fixture, but a loose control cable caused the problem. That mistake changed my inspection routine.
Heat management protects output and service life. I keep ventilation paths clear and measure temperatures near drivers, junctions, and ceiling cavities. Dust on vents can quietly reduce airflow. Fixtures should match enclosure and ambient temperature requirements stated in their technical documentation. I look for darkened plastic, softened insulation, or unusual odors, then stop operation if damage appears. Not every warm surface signals failure; however, rising heat over time deserves investigation. Thermal readings should be compared with previous records, not judged by touch alone.
A failed indoor LED fitting may show flicker, dark sections, delayed startup, or unusual heat. Isolate the circuit before opening it. Check the driver, connectors, LED module, wiring, and thermal contact separately. Replacing the whole fitting is often faster, but it can hide a recurring driver problem. Use an electrically compatible replacement with matching voltage, current, dimming method, and thermal rating. Tighten terminals correctly and inspect seals for damage. Small details matter.
The U.S. Department of Energy reports that LED products generally use at least 75% less energy and last up to 25 times longer than incandescent lighting. That does not mean every component survives equally long. Drivers, connectors, and control devices may fail earlier than the LED array. IES LM-80 and TM-21 methods also show why lumen maintenance should be assessed over time, not guessed from appearance. Measure illuminance after replacement, but control daylight and clean the sensor first.
Record the asset location, fault description, operating hours, removed part, replacement specification, test readings, and technician name. Add photographs when wiring or heat damage is present. A useful log might show 410 lux before repair, 565 lux afterward, and stable output after a 30-minute test. Record power draw too. One imperfect reading is still useful if its conditions are documented. Review repeated failures monthly. If three drivers fail in one area, investigate heat, voltage variation, or installation practice instead of replacing parts blindly.
Inspect high-use areas monthly. Review every fixture quarterly. Dusty rooms may need more frequent checks. A simple schedule works.
Check loose wiring, damaged lenses, dark sections, buzzing, and heat around drivers. Look for cracked diffusers. Photograph repeated faults when safe.
Switch off the circuit before opening any housing. Verify isolation with an approved tester. Never trust a wall switch alone. Safety comes first.
Record the date, location, operating hours, readings, defect, and technician name. Include removed parts and replacement details. Add photos for heat or wiring damage.
Flickering, dark sections, delayed startup, and unusual heat are warning signs. A faint buzz matters too. Do not ignore small changes.
Check the driver, connectors, LED module, wiring, and thermal contact separately. Match voltage, current, dimming method, and thermal rating. Compatibility is easy to overlook.
Not always. A complete replacement may be faster, but it can hide a repeated driver problem. Investigate the cause before replacing parts blindly.
Measure illuminance after cleaning the sensor and controlling daylight. Record power draw and test the fitting for 30 minutes. For example, readings may rise from 410 to 565 lux. One imperfect reading still helps when conditions are recorded.
Three failed drivers may indicate heat, voltage variation, or poor installation. Review room temperature and operating hours. The schedule should improve after each inspection.
Maintaining indoor LED lighting systems requires a clear understanding of their main components, including fixtures, lenses, drivers, wiring, controls, and ventilation areas. To learn how to maintain indoor led lighting systems effectively, begin by creating a safe inspection schedule based on operating hours, environmental conditions, and system usage. Always switch off and isolate the power before inspecting equipment, and use appropriate protective measures.
Routine maintenance should include removing dust from fixtures, cleaning lenses with suitable materials, and keeping ventilation openings clear to prevent overheating. Check electrical connections, control settings, dimming functions, and heat management components for signs of looseness, damage, or unusual performance. Faulty parts should be replaced with compatible components by qualified personnel when necessary. Finally, record inspection dates, identified problems, repairs, and replacement details. Accurate maintenance records help track system performance, improve safety, reduce unexpected failures, and extend the useful life of the indoor LED lighting system.

Velvet Light